Sunday, February 27, 2011

Herbs... not just for smoking.

One of my favorite reasons of having a home garden is access to fresh herbs. If you select the right perennial herbs then you can grow them year around for cooking, for flowers, tea, potpourri, etc. If you don't have space for a full garden, you can still grow a few herbs in pots.

It's important to ask yourself what do you want, what would you use, and what works best with your lifestyle? If you're like me and work a lot. Then you're better off selecting herbs that don't need a lot of water such as rosemary, oregano, sage, and thyme. All of these herbs can coexist well in the same pot and are great culinary herbs. It seems like more I abuse and neglect them the better they do.

Strawberry pots are a great space saver and not just for strawberries.
There's rosemary, two varieties of thyme, garden sage, and marjoram planted here.
Image from White Flower Farm.

Always keep an open mind and look for something you havn't seen before. The curry plant (Helichrysum italicum) seen at Whole Foods may add a whole new flavor profile to your standard poultry seasoning or the savoriness to your fresh green salad.

Curry Plant. Image from Mountain Valley Growers

I highly suggest trying new herbs regardless of their common name. For example, thyme is not thyme. There is English thyme (Thymus vulgaris) which is our standard thyme we find at home depot or at the super market. There's also Lemon thyme (Thymus citriodorus) which has an additional layer of flavor and Pennsylvania Dutch Tea thyme (Thymus pulegioides) which is in the same genus as the "common" thyme, but is a different species and has a different use. Finally, there's the mysterious Basil Thyme (Calamintha nepeta) which is similar to mint!


Lemon Thyme


Basil Thyme


Silver Thyme

Various "Thyme". Image from Mountain Valley Growers

If you enjoy surrounding yourself with flowers then lavender or scented geraniums may be a good choice for you. Try collecting several different types of lavender. Did you know that some lavender is good for eating while others arn't? Lavender also comes in a shades of purple, pink, white, and even yellow. You'd be surprised by the variety of cultivars and species out there. A nice mixture of Woolly lavender, French lavender, and English lavender will provide you with a wide variety of texture, color, and fragrance.

Purple and White Lavender. Image from Mountain Valley Growers

Yellow and Purple Lavender. Image from Mountain Valley Growers
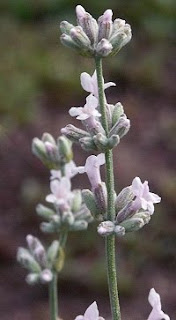
Jean Davis Pink Lavender. Image from Mountain Valley Growers

Scented geraniums come in all sizes, smells, and shape. Some grow big and tall while others are small and creep along the ground. They can smell like roses, mint, lemons, or even nutmeg! They do well in sun or partial shade and can tolerate some neglect. Of course more you water the more they'll flower, and why wouldn't you want that? You can also use the fragrant foliage to flavor sugar, scent books and paper, or make soap.

Image from: Design Sponge

But at some point in the year all your herbs will want to flower. At which point you can cut them for fresh flowers while maintaining the flavor of your herbs. Check out Mountain Valley Growers, its an online nursery where you can find a wide variety of herbs and flowers.

Wednesday, February 23, 2011

Pickling Chanterelles


I have the utmost fortune of knowing an outdoorsman who also happens to be an excellent mushroom hunter. He hooked me up with a big bag of these beautiful chanterelles, freshly picked from somewhere in the Big Sur. They smelled soooo good! To me they smell like roses, but I've heard people compare their fragrant aroma to peaches or apricots. I spent close to three hours washing and trimming all these mushrooms and I couldn't get their scent off my fingers. When fully cooked they loose much of the aroma but they have a nice firm texture and a lightly peppery finish to them.

I was tempted to melt a big hunk of butter and saute them, but begin close to the end of their season I wanted to preserve them for the summer time when they'd be no more. I've seen a few mushroom pickling recipes in a magazine here and there, but none of them really specified how long the mushrooms would stay good for. I found a pickled mushrooms recipe on the Food Network website by Michael Symon who claims his mushrooms will hold for up to one year, so I've adapted his technique and mashed it with a preserved mushroom recipe found in the August 2010 issue of La Cucina Italiana to come up with my own pickled mushroom recipe.

I love the Italian recipe because the mushrooms are preserved in white wine vinegar and dry white wine. I was concerned that I'd loose all the aroma of these beautiful mushrooms, but I think I've figured out a way to shove all the fragrance back into them. I had recently picked up a bottle of Stanza gewurztraminer 2008 and Gallo's Extra Dry Vermouth. I think the two of them will work well with the pickled chanterelles. The gewurztraminer has a nice aroma of roses and ripe mango and tasted like peaches, lychee, honeysuckle and a bit of spice. The vermouth has a nice creamy vanilla aroma, light body and suprising smooth for only $2.99.

I won't know for at least a week if my recipe was a success or a flop, but I am glad that the chanterelles retained their beautiful golden color. I can't wait to cook up a nice piece of meat to serve the mushrooms with. Or a big bowl of pasta with cracked pepper and pickled chanterelles... mmmmm.

Recipe: Yields 2 pints

1/4 cup salt
4 cups water
2 pounds mushrooms ( A bit over 2 cups cut into pieces)
2 cups white wine vinegar (7 percent acidity)
2 cups dry white wine
1 cup extra-virgin olive oil
Garlic cloves, peeled and lightly crushed (1 or 2 per pint jar)
Bay leave (1 per pint jar)
Peppercorn (A few whole peppercorn per pint jar)
Cloves (2 per pint jar)
Optional herbs (Thyme, tarragon, or mint)

1. Prepare the mushrooms by cleaning off the dirt, trimming off any moldy spots, and scrapping off the bottom stems. Cut or tear them by hand into large pieces.


2. Mix the salt and water, and pour the brine over the mushrooms. Let the mushrooms sit in the refrigerator, covered for 24 hours.


3. Remove the mushrooms from the brine, rinse, and then lay them out on paper towels to dry. (I had to change the paper towel a few times over a period of an hour while I sterilized all my equipment and jars.)


4. Dry saute them to heat them up (and drying them up a bit more), then drop them into a bath of boiling white wine vinegar. After 1-2 minutes pack about 1 cup into dry, sterile pint jars.

5. Place the garlic clove, bay leave, peppercorn and optional aromatic herb on top of the mushrooms.

6. In a saucepan, add the wine and oil to the vinegar; bring to a boil and pour the boiling mixture over the mushrooms. Leave 1/2 inch room from the top. (The mushrooms will absorb the mixture as it cools.)


(The chaos that was my stove top/ kitchen.)

7. Screw on the lid. Invert the jars on a kitchen towel and allow them to cool to room temperature. When they are cool, tighten the lids and refrigerate.


(You can see where the mushrooms caramelized during the dry saute process)

*Warning: Your house will smell like feet from all the vinegar. Be sure to keep all doors closed to prevent flies from wandering in. The last pickling fest I had at the end of summer, I left my front door open to let some cool air in and ended up being plagued by a hundred flies in my apt.

Midnight snack

I woke up in the middle of the night for a glass of water, and ended up making a grilled cheese sandwich. I love grilled cheese sandwiches. I pulled out slices of bread, the block of sharp cheddar, and the sandwich meat (why not?). I was going to toast the bread in the toaster and microwave the thing, but why?

I start by heating two pans. A nonstick pan to grill the sandwich on (on high) and a heavy skillet to press down on the sandwich (on medium low). I buttered up two slices of bread on one side, sliced some sharp cheddar, and pulled out a few slices of the turkey. When the pan was hot I threw on the bread, and assembled the sandwich. (Its very important that you put the cheese between the bread and the turkey on both sides for maximum cheese contact.)

By then I could smell the bread toasting. I flipped over the sandwich, place a piece of foil to cover it and pressed down onto the pan with the medium hot skillet. Turn the pan down to medium low and let the cheese melt. After a few minutes I took it off the heat and barely managed to snap a shot before wolfing it down and returning to bed.

Sunday, February 20, 2011

Swiss Chard Pie


I love swiss chard. The plant does amazingly in almost any garden, grows for almost two years and is extremely productive. I recommend having at least one plant per member of your household in your home garden. Today I went to the Neighborhood Community Garden and swapped some of my arugula for some swiss chard with a fellow gardener.

It was a nice change from all the black kale, arugula, and mustard greens I've been eating. My friends and I grew it two seasons ago and we were eating swiss chard five times a week! (We got so sick of it we decided not to grow it again... a decision I've regretted.) It was also a nice addition to my pb&j and ramen diet.

I wanted to make a quick meal out of it so I went into my pantry and fridge and pulled out two frozen pie crusts, my block of cheddar, and a can of vegetable soup. I sliced the swiss chard into 1/2 inch thick slices, mixed it with the can of soup, and threw in some shredded cheese. Defrosted the pie crust. Assembled and baked it. Took about 15 minutes to prep it, 35minutes to bake it and I had a delicious swiss chard pie. :) Rachel Ray would have been so proud of me.

Recipe: (Serves 4-6)

5 cups of chopped Swiss chard (about 6-8 leaves with stalks)
1 can of chunky vegetable soup (16 ounce can)
1 cup of shredded cheese.
2 roll out pie crust.

1. Toss the first three ingredients in a bowl while your pie crust defrosts.

2. Butter a pie dish and roll out the bottom crust.

3. Fill the dish with your stuffing.

4. Roll out the top crust. Make sure you poke a few holes in the top to allow steam to escape.

5. Brush the crust with oil or a cream and egg mixture.

6. Bake for 35-45 minutes at 375F

7. Allow it to rest for 5-10 minutes.

8. Cut and eat.

The pie assembled without the top. It's so green it looks too healthy.

Friday, February 18, 2011

Preserved Meyer Lemons


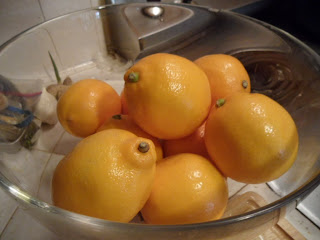
I swear someone's been leaving these lemons for me. I've been wanting to get some meyer lemons for some time. They originated from China and are a cross between a lemon and a mandarin orange. It has all the great lemon flavor and aroma with a sweet tart to them. This week someone left a basket of them in the break room at work. I collected them all week and I've got a nice bowl of them to work with.

When I find a treat like these I like to preserve them so I can enjoy them when they're not around. I've made lemon curd one year, and that was nice. But this year I decided to make preserved lemons.

I've only had preserved lemons once when I went to a Moroccan place. It came out in a little bowl with the roasted lamb and it was DELICIOUS! (You can bet there will be a blog with a Moroccan style lamb coming soon.) I've also seen recipes were preserved lemons are chopped and served mixed with vegetables.

I found a recipe on Epicurious.com and used that as my starting point. I made a Safi mix with cinnamon sticks, dried home grown pepper, cloves, and coriander seeds collected from last season. I sliced my lemons into quarters leaving it still attached to each other at the nipple and packed them with at least one heaping tablespoon of salt. I packed them into a sterilized jar and now all I have to do is wait for 3o days to cure.

Tuesday, February 15, 2011

Gone Bananas

Bananas add a brightness to the winter vegetable and fruit selection. In this month's edition of Fine Cooking magazine there was an article on bananas. They did a great job presenting how to use bananas at different stages of ripeness and offered several different types of recipes using bananas. This really had me going.

Fabulous T gave me some perfectly ripen plantains, and I couldn't wait to get home and make something yummy out of it. Something sweet but savory; bright but warming. Inspired by the article in Fine Cooking, I decided I wanted to make a plantain curry.

I started my base by reducing 2 cups of chicken stock and 1.5 cups of thick coconut milk by half. Once the base was reduced I added a few cloves of garlic, a 6in stick of lemon grass, and a healthy tablespoon of minced ginger. I allowed the flavors to mellow out before adding 2lbs of cooked chicken. Then I began adding my curry spices. I had to restrain myself from dumping in all my usual curry spices (cinnamon, nutmeg, cumin, cardamon, fenugrek, coriander, tumeric, etc.)

I wanted to keep the bright asian flavors of the lemon grass and the ginger. I added a teaspoon of tumeric to bring out a rich yellow color, and restricted myself to only adding a bit of cardamon and ground coriander seed to the curry. The soup was super rich and savory from the chicken stock, so I brought it up a little bit with a pinch of cinnamon.

I added sliced plantains and waited. The flavors started melting together; the plantain helped harmonize all the different flavors in the pot. But something was missing. So much of the brightness lent from the lemon grass and ginger kept getting cooked away. I added a touch of minced orange habanero and it did the trick. It gave the curry a slight kick and brightness I was looking for.

I garnished the dish with chopped cilantro and crushed cashews and served it over brown rice. Healthy and delicious! The plantains had a nice firm texture to them, almost meaty, and not overly sweet.


Recipe: Makes 4-5 servings. Modified.

1 (14oz) can of thick coconut milk
1 (14oz) can of chicken broth (or at least a cup of water)
6 inch stick of lemon grass crushed
3 large cloves of garlic sliced
2-3 tspn minced garlic
2lb of cooked chicken
2 tspn ground tumeric
1 tspn ground coriander seed
1/2 tspn ground cardamon
1/2 tspn cinnamon (or cloves or allspice will work well)
2 ripe plantains (cut into 1 inch thick chunks)
1 habanero minced

1/4 cup cashews or peanuts chopped (for garnish)
1/4 cup cilantro chopped (for garnish)

1. In a heavy skillet add your liquids and bring to a boil. If using chicken stock allow the mixture to reduce by a quarter. (I let it reduce by half and ended up having to add water at the end. If using raw chicken I'd recommend adding the chicken at this point and allowing the liquid to simmer letting it simmer a little hot rather than at a rolling boil.)

2. Once the liquid is reduced add the spices and give it a good swirl. The liquid should turn yellow. If you'd like it yellower, add a bit more tumeric. Add the garlic, lemon grass and ginger allowing the flavors to to come together. Give it a few minutes and add your cooked chicken and plantains.

3. When the mixture is all heated and the chicken starts to fall apart slightly. Add the minced habanero. Give it a quick stir, and allow the curry to rest and thicken. Adjust the thickness by adding a little bit of water at a time.

4. Serve over rice and garnish with cilantro and cashews.

Monday, February 14, 2011

Valentine Dinner for One

Today was a long day. Valentines should not fall on a Monday. Of course when you're cooking for one it really doesn't matter when it falls on. But after cooking for 40 this weekend I decided to cook something fast and easy.

I grabbed a cornish hen (ahh gotta love the sales) from the store on my way home. I rubbed it generously with salt, pepper, and Meyer lemon zest. Squeezed the juice all over it, coated with a bit of oil and let it marinade while I diced a sweet potato, turnip, and onion. I tossed the vegetables with a bit of olive oil and thyme. I put the chicken and the vegetables in a heavy skillet and roasted the entire thing in the oven for about 25 minutes at 425 F. Both cooked about the same.

While the bird and root vegetables were going in the oven I popped open a can of white kidney beans, mixed in some minced garlic and flavored it with just a bit of grated Parmesan. Alright time to eat!

Saturday, February 12, 2011

Food for 40


There's nothing I enjoy more than hanging out with my friends, working at my farm, and creating wonderful food. The Jew asked me for some help planning a dinner party for some of his friends and what was supposed to be a "simple" meal exploded into a feast.

The meal was supposed to be a pork tenderloin, ceviche, things from the garden, and paella. The boys went to the store and came back with 4-5lb of shrimp, 2lb scallops, 2lb cuttlefish and squid, mussels, clams, 8cups of uncooked rice for the paella, and enough wine to make sangria to drown a small whale. I was able to harvest a huge bag of arugula, black kale, broccoli rabe, turnips, giant red radishes (which I thought were beets the whole time they were growing), and SIX fresh eggs.

The beauty of having fresh ingredients available at your disposable is that you're able to create something wonderful. I strive to utilize the fresh flavors of my ingredients as the focus of my food.

I blackened the kale by flash frying it in a tiny amount of canola oil. It has such a great nutty flavor I forgot to salt it, and no one complained. The turnips were a real treat. I normally roast them, but these were a bit older than I'd prefer so I ended up boiling them and making a mash. I wasn't too sure about it, but my friend Dior was right. They were FABULOUS! (She's been giving me suggestions about what I should do with my vegetables.) I was expecting a fibrous, bitter mash. But it was sweet, moist, and creamy. No extra salt or oil was needed.


The fun one for me was using the broccoli rabe. I wanted to make a mayo based broccoli salad with homemade mayo. I took some of my fresh eggs and whipped up a batch of mayo using olive oil and red wine vinegar I've been aging with all the left over bottles of red wine. I grated some cabbage and carrots (cough cough I grew...) and made a cold slaw. (Totally seasonal) I tossed in some dried cranberries left over from Thanksgiving and garnished it with slices of the beautiful radish. It was so light and flavorful people were asking if there was actually any mayo in it. (Forgot to salt it came out wonderfully.)


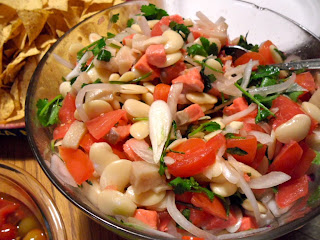
An old member of the Surf Club donated some mahi mahi and salmon steaks for dinner. It wasn't enough to cook and serve as an entree... so I took the risk of making ceviche. Everyone knows that ceviche should be made with fresh fish. These had been vacuum sealed and frozen. But I took the risk of defrosting them and curing them in lemon juice and vinegar for several hours before consuming it. While the fish was curing I tossed together diced hot house tomatoes, sliced onions, fresh cilantro from the garden, minced garlic and whole lima beans with a bit of oil and lemon juice and let the flavors merge. The result was a beautiful mixture with fresh flavors and a mixture of several great textures.


I marinated the pork tenderloin in a simple rub of rosemary, salt, pepper, and olive oil for several hours. Seared it on the grill, then tossed it in the oven to finish baking on a cedar plank. When it was finished I sliced it up and laid it accross a bed of arugula tossed in olive oil. I drizzled the entire thing with a bit of balsamic oil and a dash of salt.


But of course the star dinner table was the paella. (The Spaniard's a 25 year old lawyer from Spain who's visiting and living at the Surf Club. He's been talking about making paella from day one that he arrived. I've made paella before, and have a pretty good idea of how its made. But he swore he was going to teach me how to make a real Spanish paella.) Making paella for a large group without a proper paella pan has always been a challenge for me. The rice must be cooked in a thin layer so that they can all bounce and not stick together. I ended up boiling the rice al dente in a large pot of water, straining it and rinsing it in cold water to stop the cooking process.

The Spaniard fried all the sea food (in small batches) before adding it to the rice. Then browned the onion and garlic in the oil. Added half a can of diced tomatoes, saffron, and water to the rice and baked it for 15 minutes. The result was a perfect paelle that was light and fluffy with a lot of flavor.


I brought out a jar of my pickled cherry tomatoes from last season to share.


Little Alex rolled up some beautiful sushi. White boy's got mad Asian skills.


We fed 30+ people with plenty of left over for days!


(Buffy sampling some Sangria with me mid afternoon. She approved. Going back for seconds.)

Monday, February 7, 2011

Staple Soup

There are a few things that you can always be sure to find in my house:

Bratwursts
Can Tomatoes
Chicken
Cans of Beans
Carrots
Onions
Greens (this time Black Kale)
Parmesan.

When I'm feeling cold and lazy I like to throw everything into a pot and make a big soup. Tonight was one of those night. A good soup is filling and so easy to do. I let the whole thing simmer for at least 30 minutes. Add a dash of dry basil, thyme, and rosemary (all from the garden). Throw in the kale. Stir. Serve. Garnish with shaved Parmesan. My recommendation is to splurge a little on a good block of aged parmesan cheese. It will store a long time in the fridge and a little will go a long way.

Saturday, February 5, 2011

Ja Jang Myeon


Ja jang myeon is one of my favorite Korean Chinese dishes. It's thick cut wheat noodles topped with a salty black bean paste originating from China. Its a very popular Korean dish. When I was in Seoul, Korea there isn't a place you can't get it delivered to you and for cheap!

I've got a big bag of paste mix and made some for dinner tonight with my own toppings using sweet potatoes, zucchini, onions, and asparagus. I made the paste out of a package so all I've got for you are pictures. If you want the recipe let me know, I'll figure one out.


Here's the brand I prefer. Its Ottogi. This is the big package, but you can find individual packets at Korean or other Asian markets.


Fresh wheat noodles, cut and packaged. When I'm out of these, I use spaghetti noodles.